Learning how to grow mushrooms at home is cost-effective, eco-conscious, and insightful. Producing your own specialty mushrooms, such as shiitake, lion’s mane, oyster, and cremini, can be much more budget-friendly than purchasing them from supermarkets or local markets.
Using just a handful of simple tools and ingredients, you can cultivate mushrooms indoors by introducing mycelium, the fungal root-like network, into a growing medium like straw or wood chips.
Continue reading to learn how to grow easy-care, sustainable, and nutritious mushrooms with the help of ready-made kits, logs, containers, or even directly in your garden.
Table of Contents
ToggleBest Methods to Grow Mushrooms
There are several ways to cultivate mushrooms at home, whether indoors or outdoors:
Using a grow kit: This simple and convenient approach starts with buying a pre-inoculated mushroom block that’s ready to fruit.
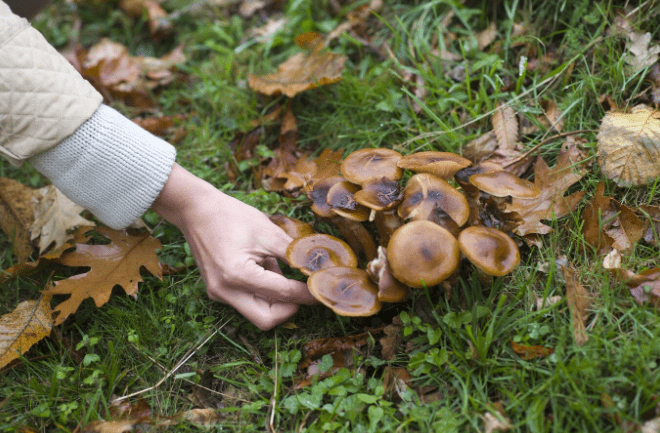
On logs: Certain mushroom varieties can be grown by drilling holes into logs or tree stumps and introducing mushroom spawn.
In buckets: This compact outdoor technique lets you grow mushrooms in reusable containers, making efficient use of space.
In garden beds: You can prepare a dedicated area in your garden where mushrooms can flourish on a substrate like straw or wood chips.
How to Grow Mushrooms With a Grow Kit
A mushroom growing kit is perfect for cultivating mushrooms indoors. These kits usually come with a block of substrate already colonized by fuzzy white mycelium and wrapped in a plastic bag. You can find kits for varieties like oysters, shiitake, and crimini at local mushroom farms or through online retailers. While it’s important to follow the specific instructions included with your kit, here’s an overview of the general process:
- Place the mushroom block in a warm spot away from direct sunlight and excessive dryness.
- Cut an X-shaped opening in the plastic bag on the front of the block, then mist the exposed area thoroughly with water.
- Keep the block moist by spraying it at least twice daily. Within one to two weeks, small mushroom pins will begin to emerge.
- Once the pins appear, the mushrooms will grow rapidly and should be ready to pick up within a few days.
- After harvesting, you can break up the spent block and either add it to your garden soil or compost or place it in a shady outdoor area, keeping it damp to encourage a second crop.
How to Grow Mushrooms On a Log
Growing mushrooms on logs requires more effort than using a ready-made kit and takes significantly longer from start to harvest. However, it’s a cost-effective approach, and a well-inoculated log can produce mushrooms for several years, depending on its size and the mushroom variety. Using this method, you can cultivate shiitake, oyster, lion’s mane, reishi, and other types.
- Begin by collecting freshly cut logs from hardwood species like oak, elm, maple, or birch. Logs should be at least 4 inches in diameter and 3 to 4 feet long. Keep in mind that thinner logs or smaller branches colonize faster but won’t yield mushrooms as long as thicker logs. Obtain premade plug spawn for an easier and quicker application, or use sawdust spawn. Be sure to verify that your chosen wood matches the mushroom species you intend to grow.
- Drill holes about an inch deep into the logs, arranging them diagonally with spacing between 3 and 6 inches, depending on the mushroom type.
- Place the spawn into each hole.
- Seal the holes with melted, food-safe wax to prevent contamination and moisture loss.
- Set the logs in a cool, shaded, and damp spot. In hot or dry regions, consider using a mister on a timer to keep the logs moist. Depending on the mushroom variety and environmental conditions, logs inoculated in spring may begin fruiting in the fall or the following year.
How to Grow Mushrooms in a Bucket
Cultivating mushrooms in a bucket or similar container can be done indoors or outdoors with basic equipment. Before adding mushroom spawn, it’s important to pasteurize your growing medium. Here’s how to grow mushrooms in a bucket:
- Start by drilling ½-inch holes in a diamond-shaped pattern all around a clean, food-grade 5-gallon plastic bucket with a lid.
- If you’re using wood chips or straw, pasteurize the substrate by placing it in a large mesh bag and soaking it in a clean plastic tub filled with water heated between 140 and 180°F. Let the substrate soak overnight to fully hydrate, then remove the bags and let them drain and dry for another night.
- Sterilize your bucket thoroughly, then layer about 2 inches of substrate alternated with thin layers of mushroom spawn. Use a minimum of 2.5 pounds of spawn per bucket for best results.
- Secure the lid and place the bucket in a cool, humid spot indoors or outdoors.
- Loosely cover it with a clear plastic bag to maintain moisture and prevent the substrate from drying out. The spawn should colonize the substrate within roughly two weeks.
- Watch for the appearance of pins (tiny mushroom beginnings). Once these form, mist the bucket frequently to keep moisture levels high. Your mushrooms should be ready to pick in approximately 10 days.
How to Grow Mushrooms in Garden Beds
If you have enough outdoor space, you can cultivate mushrooms right in your garden. This approach utilizes shady spots that aren’t ideal for other plants and also helps improve soil health. The traditional garden mushroom is the wine cap, also known as stropharia, but you can also grow shiitake, oyster, lion’s mane, hen of the woods, morels, and others using this method.
- Select an area in your garden where you want to grow mushrooms and cover the ground with a layer of cardboard.
- Spread about 2 inches of wood chips, straw, or another suitable substrate over the cardboard, then sprinkle a thin layer of mushroom spawn. Repeat these layers until your mushroom bed reaches at least 8 inches deep.
- Apply mulch on top and water thoroughly to moisten the substrate, especially during the first few weeks.
- With time, the spawn will fully colonize the substrate, and mushrooms will begin to fruit. A bed established in spring is typically ready to harvest by fall.
- Add another layer of substrate mixed into the bed to encourage a second crop the following year.
Tips for Growing Mushrooms at Home
Keep these tips in mind when you’re ready to start growing your own mushrooms:
- Spring is an ideal season for outdoor mushroom cultivation, whether using buckets, logs, or garden beds.
- Mushrooms flourish in cool, damp conditions, so be sure to check and mist the substrate while the mycelium develops regularly and after pins start to form.
- Store your mushroom kits, buckets, and logs in a cool, humid environment. Optimal growing temperatures between 60°F and 75°F.
- Once you see pins, mushrooms can grow rapidly. Harvest them when they reach a good size but are still young and firm for the best texture and flavor.